

Key Takeaways
Roof Damage Escalation
Roof damage escalation is the process by which a minor, inexpensive roofing defect-such as a cracked shingle or loose flashing-gradually grows into a much larger and costlier structural problem when left unaddressed. Water, wind, and temperature changes exploit every small vulnerability, steadily widening the damage. What costs a few hundred dollars to fix early can become a multi-thousand-dollar repair once the underlying deck, insulation, or interior framing is affected.
Most roofing materials are designed as integrated systems; a failure in one component-shingles, underlayment, flashing, or decking-compromises the waterproof barrier the entire assembly depends on.
How a $200 Problem Becomes a $20,000 One
Roofing problems follow a consistent and expensive pattern: the earlier the issue is caught, the cheaper it is to fix. A single displaced shingle exposes the underlayment beneath it. Rain infiltrates, saturating the wood decking. Over weeks or months, that wood begins to rot. Mold follows. Eventually, the rot spreads to the rafters and ceiling joists below-components that are expensive and disruptive to replace.
This progression isn't unusual. It's the normal lifecycle of unaddressed roof damage. The roof's job is to act as an integrated waterproof system, and every component-shingles, underlayment, flashing, and decking-depends on the others being intact. When one element fails and isn't repaired, the remaining components absorb the burden until they fail too.
$1,000-$3,000
Typical cost of moderate roof deck repair
Industry estimates from roofing contractors suggest localized deck repairs in this range, compared to $150-$400 for early shingle or flashing fixes.
40%
Of homeowners who inspect their roof annually
Surveys by home improvement research groups suggest a majority of homeowners go multiple years without any formal roof inspection.
24-48 hours
Time for mold growth after sustained moisture exposure
According to the U.S. Environmental Protection Agency, mold can begin to develop on wet building materials within one to two days under the right conditions.
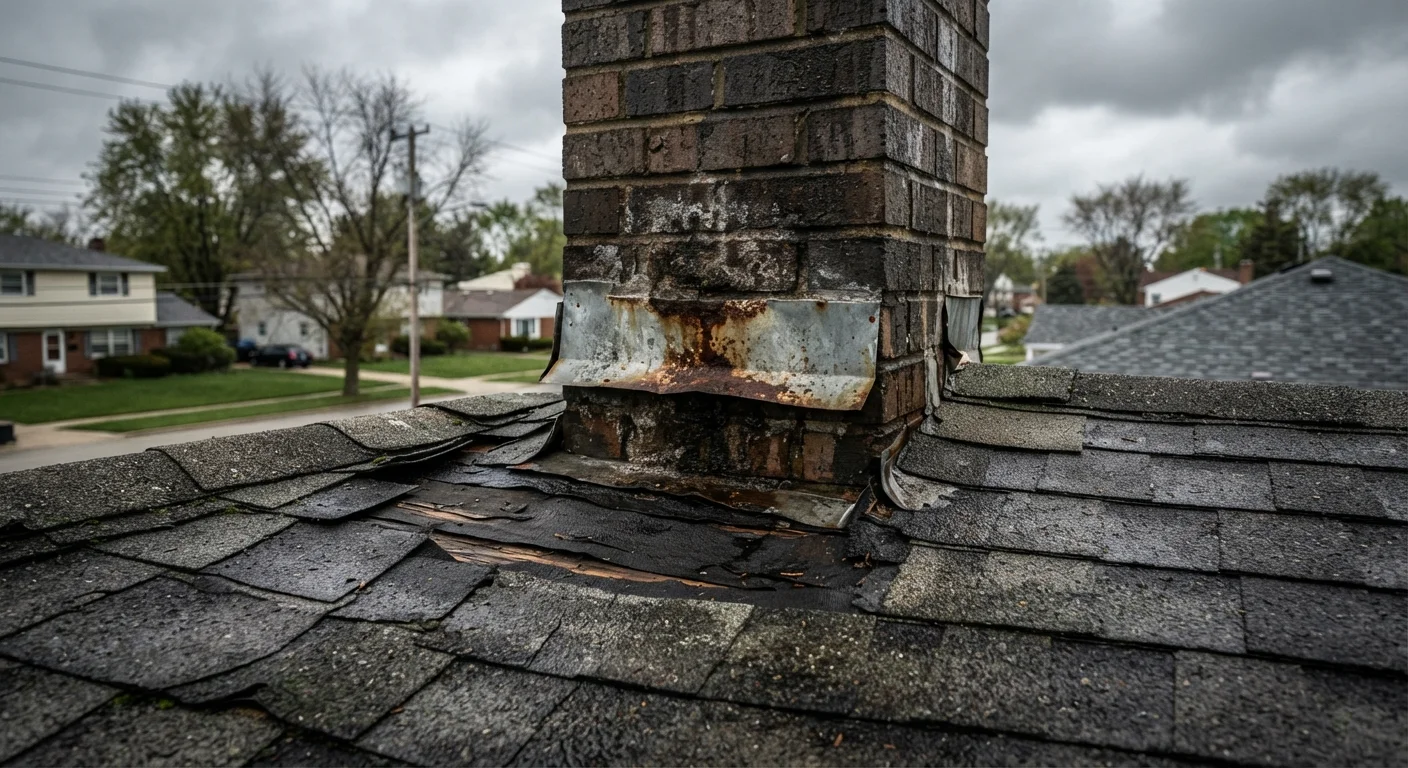
Flashing is especially prone to this kind of silent failure. The thin metal strips that seal joints around chimneys, skylights, valleys, and vents are the most common entry points for water. They expand and contract with temperature changes, and the caulk or sealant holding them in place degrades over time. For more on how moisture finds its way into a home's envelope, see our guide on weatherproofing your home.
The Hidden Damage You Can't See from the Curb
One of the most dangerous aspects of roof deterioration is how long it stays invisible. Water entering through a small breach doesn't immediately produce a ceiling stain. It first saturates the insulation in your attic, which can hold a significant amount of moisture before any signs appear below. By the time a water ring shows up on your drywall, the damage above it is often already extensive.
Attic ventilation plays a direct role in how quickly hidden damage escalates. Poor airflow traps moisture and heat, accelerating wood rot and mold growth in the very space where early damage would otherwise be detectable. Our article on attic ventilation explains what adequate airflow looks like and why it matters for roof longevity.
Check the Attic After Every Major Storm
After heavy rain or high winds, a quick attic inspection-before you ever go on the roof-can reveal active leaks, new staining, or damp insulation. This takes five minutes and gives you early confirmation of whether a professional inspection is warranted. Bring a flashlight and look at the underside of the deck along the ridge and near any penetrations.
Gutters also contribute to hidden roof damage. Clogged or improperly pitched gutters allow water to back up under the eaves, soaking the fascia board and eventually the roof deck. This is one of the most underappreciated causes of roof edge deterioration. Our companion piece on gutter maintenance mistakes covers the common errors that lead to this kind of damage.
What a Practical Roof Inspection Actually Involves
You don't need to climb onto your roof to catch most problems early. A methodical ground-level and attic inspection, done twice a year, will identify the majority of developing issues.
- From the ground: Use binoculars to scan for missing, buckled, or curling shingles. Look for granule loss (shingles will appear patchy or bare). Check that all flashing around chimneys and vents appears flat and intact-lifted or separated edges are a clear warning sign.
- From the attic: On a bright day, turn off any lights and look for pinpoints of daylight through the roof deck. Check the underside of the decking for dark staining, soft spots, or visible mold. Feel the insulation near the eaves for dampness.
- After storms: Inspect the gutters for an unusual volume of granules, which signals accelerated shingle wear. Walk the perimeter and look for shingle debris in the yard.
When a repair need is identified, the question of whether to handle it yourself or call a contractor matters. For guidance on how to make that call realistically, see our framework on DIY vs. hiring a pro.
Catching roof problems early is one of the most cost-effective things a homeowner can do. The inspection itself costs nothing; the habit of doing it regularly is what saves thousands of dollars over the life of a home.