

Key Takeaways
Why Dryer Vent Cleaning Is a Safety Issue, Not Just Maintenance
The U.S. Fire Administration has consistently identified clothes dryers as a significant source of residential fires, with lint accumulation inside the vent system identified as the primary contributing factor. Unlike many household hazards that are visible, lint buildup hides inside ductwork where it's easy to forget about - until something goes wrong.
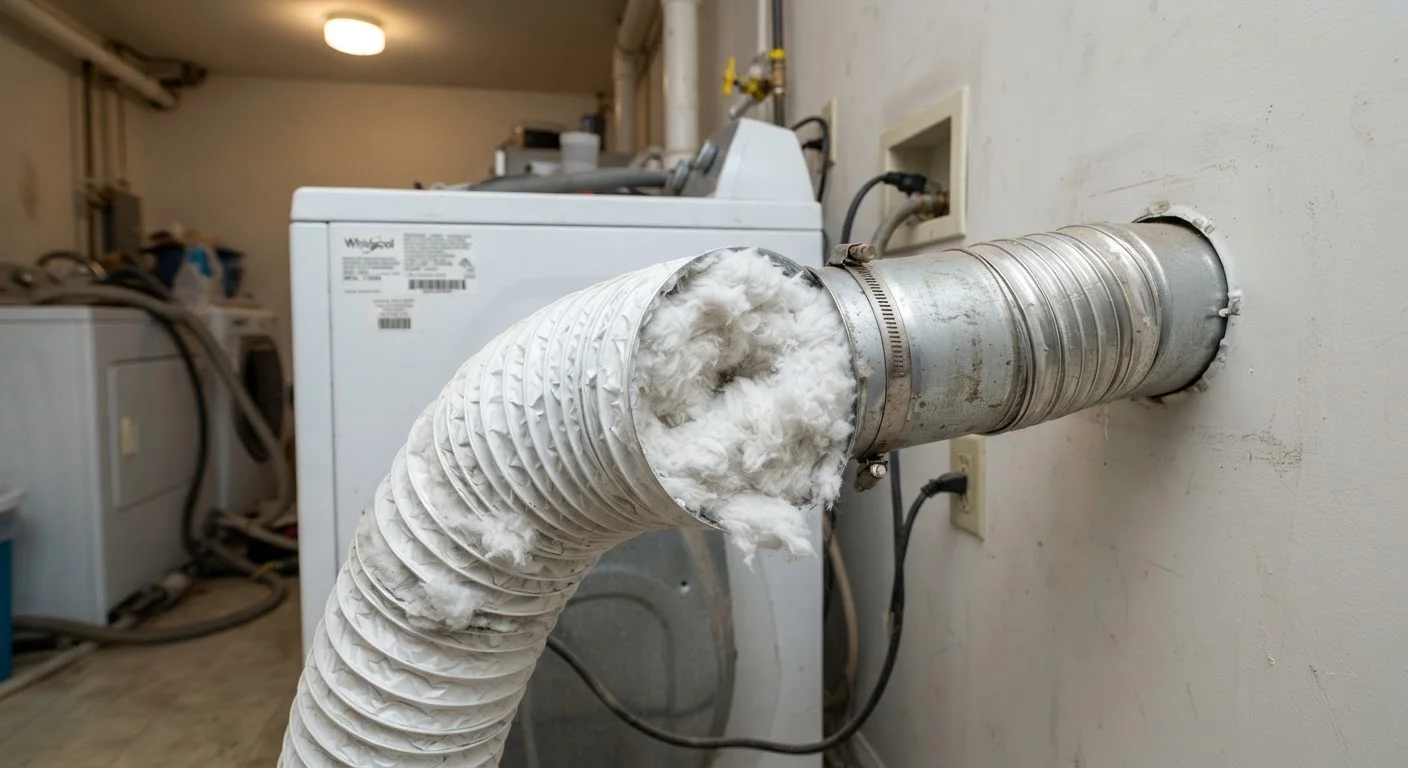
Every time your dryer runs, it pushes moist, hot air - along with microscopic lint fibers - through a duct that vents to the outside of your home. Over time, lint clings to the interior walls of the duct. As the layer thickens, two problems compound: airflow is restricted, forcing the dryer to work harder and run hotter, and the accumulated lint becomes fuel. Dryer exhaust temperatures can be high enough to ignite a dense lint clog.
This issue fits squarely into the category of routine preventive care that protects your home's long-term safety. If you follow a seasonal maintenance schedule - as outlined in your home's hidden maintenance calendar - dryer vent cleaning belongs on that list at least annually, and more often for households that run multiple loads per day.
Never Vent a Dryer Indoors or into a Wall Cavity
Some older installations or DIY workarounds route dryer exhaust into an attic, crawlspace, or interior wall rather than directly outside. This introduces serious moisture, mold, and fire hazards and is not compliant with current building codes. If you suspect your dryer isn't venting to the outside, have the ductwork inspected by a qualified contractor before using the appliance.
How the Dryer Venting System Works
Understanding the system helps you identify where problems develop. A typical residential dryer venting system has three main parts:
- The transition duct: A short, flexible connector (ideally semi-rigid metal) that links the dryer's exhaust port to the wall.
- The rigid duct run: Metal ductwork routed through walls, floors, or ceilings to the exterior of the home. This section varies significantly in length and can include multiple bends or elbows.
- The exterior vent cap: A louvered or flap-style cover on the outside wall or roof that allows exhaust to exit while preventing pests from entering.
Each bend or elbow in the duct run slows airflow and creates a surface where lint catches more easily. A duct that runs 25 feet with two 90-degree elbows behaves very differently from a straight 6-foot run - a factor that determines both cleaning frequency and whether DIY cleaning is sufficient.
Flexible plastic or foil accordion-style ducts - still found in many older homes - are particularly prone to lint trapping and kinking. Building codes in most U.S. jurisdictions now require rigid or semi-rigid metal ductwork for dryer exhaust; if your home has plastic flexible duct, replacing it is strongly advisable regardless of its current condition.
Warning Signs Your Vent Needs Attention Now
Don't wait for your annual cleaning if you notice any of the following:
- Clothes - especially heavy items like towels or jeans - take two or more cycles to dry fully.
- The dryer or laundry room feels unusually hot during or after a cycle.
- You detect a burning smell when the dryer is running.
- The exterior vent flap isn't opening or has reduced airflow when the dryer is on.
- Visible lint accumulation around the dryer's exhaust connection or on the exterior vent cap.
- The dryer shuts off mid-cycle due to overheating (a built-in thermal safety feature).
Any of these signs indicates a partially or fully obstructed vent. Continuing to use the dryer in this state increases fire risk and accelerates wear on the appliance. This is one of those maintenance realities - much like furnace filter changes - where delay has measurable consequences. See our guide to furnace filter frequency and MERV ratings for a parallel example of how routine upkeep prevents larger problems.
Make Lint Trap Cleaning a Daily Habit
Cleaning the lint trap before or after every load is the single easiest way to slow buildup inside the vent duct. A clean trap allows air to move more freely through the entire system, reducing strain on the dryer and extending time between full vent cleanings. It takes about ten seconds and meaningfully reduces risk.
Step-by-Step: Cleaning a Dryer Vent
Before starting, assess your vent run. If the duct is longer than 15-20 feet, includes multiple elbows, or terminates through the roof rather than a side wall, professional cleaning is strongly recommended. For shorter, simpler runs, the following steps apply.
What you will need
Dryer vent cleaning brush kit
Long flexible rods with a lint brush head sized for standard 4-inch dryer ducts - the core tool for dislodging accumulated lint.
Vacuum with hose attachment
Removes loosened lint from the duct opening, dryer exhaust port, and lint trap housing.
Screwdriver (flathead or Phillips)
Loosens hose clamps securing the transition duct at both connection points.
Semi-rigid metal transition duct (4-inch)
Replacement duct if the existing transition duct is plastic, damaged, or kinked.
Replacement exterior vent cap
Needed if the existing cap is damaged, corroded, or uses a fine mesh screen that traps lint.
Disconnect and move the dryer
Unplug the dryer from its electrical outlet. If you have a gas dryer, turn off the gas supply valve - do not attempt to disconnect the gas line yourself; only move the dryer far enough to access the transition duct. Pull the dryer away from the wall carefully to avoid kinking or damaging the transition duct.
Disconnect the transition duct
Loosen the clamp or tape securing the flexible transition duct to the dryer's exhaust port and to the wall duct opening. Remove the transition duct and inspect it for lint buildup, kinks, or damage. If it's plastic flexible duct, this is the time to replace it with semi-rigid metal duct.
Vacuum the dryer exhaust port
Using a vacuum with a hose attachment, clean inside the dryer's exhaust port opening as far as the hose reaches. Wipe the opening with a dry cloth to remove residual lint. Also clean the lint trap housing on the dryer itself - pull out the trap and use a narrow brush or vacuum nozzle to clear lint from the slot.
Use a dryer vent brush to clean the duct run
Insert a dryer vent cleaning brush into the wall duct opening. Work the brush in and out with a rotating motion, pulling lint toward you. Connect extension rods as needed to reach further into the duct. After brushing, use a vacuum to remove loosened lint from the duct opening. If the brush meets significant resistance or you can't reach the full length, stop and contact a professional.
Inspect and clean the exterior vent cap
Go outside and locate the vent cap. Remove any lint or debris blocking the flaps or screen. Confirm the flaps open and close freely. If the cap is damaged, corroded, or has a fine mesh screen (which traps lint and restricts airflow), replace it with a code-compliant louvered or flap-style cap.
Reconnect and test
Reattach the transition duct to both the dryer exhaust port and the wall opening, securing with clamps. Restore the dryer's power (and gas, if applicable). Run the dryer on a short air-only or low-heat cycle and go outside to confirm exhaust is flowing freely from the vent cap. Airflow should be clearly perceptible.
When to Call a Professional
Professional dryer vent cleaning services use high-powered rotary brushes and commercial vacuums capable of clearing obstructions in long or complex duct runs. The cost is generally modest relative to the fire risk and appliance damage that a blocked vent can cause.
Hire a professional if:
- Your duct run is long, heavily elbowed, or routes through the roof.
- You discover damage to the ductwork during your inspection (gaps, crushed sections, disconnected joints).
- The exterior vent cap is inaccessible or appears damaged.
- You've noticed warning signs but cleaning the accessible sections didn't resolve them.
When vetting service providers, look for technicians certified by the Chimney Safety Institute of America (CSIA) or the National Air Duct Cleaners Association (NADCA), as both cover dryer vent cleaning in their credentialing. Ask for before-and-after photos and confirm the technician will inspect the exterior vent cap as part of the service.
Like many home systems, the dryer vent is easy to overlook until something goes wrong. The home maintenance myths that cost homeowners money article explores how this kind of overlooked upkeep often carries the steepest price tag in the long run.